Key Points
- A well-structured bathroom remodeling checklist keeps your project organized and avoids costly mistakes.
- Planning phases like setting a budget, defining the layout, and ordering materials early are essential for staying on track.
- Professional help with plumbing, electrical, and ventilation can make the difference between a remodel that lasts and one that falls apart.
Don’t Let Your Dream Bathroom Go Down the Drain
What’s the real order of steps when remodeling a bathroom, and how do you keep from forgetting something big? Wondering how the pros manage to stay on track without running out of money or time? In this post, you’ll get a full breakdown of the bathroom remodeling process from planning to final cleanup.
By the end, you’ll know what the pros should be doing when working on your bathroom remodel.
What Should Be on a Bathroom Remodeling Checklist?
- Set a realistic budget
- Define bathroom layout and design style
- Obtain necessary permits
- Order materials early
- Tear out old fixtures and surfaces
- Inspect for hidden water damage or mold
- Prepare job site and protect surrounding areas
- Complete plumbing rough-ins
- Complete electrical rough-ins
- Install or upgrade ventilation fan
- Replace drywall and prep ceilings
- Level subfloor and install underlayment
- Install tile floor or other waterproof flooring
- Waterproof shower and tub areas
- Install wall tile and backsplash
- Set and plumb vanity and sink
- Install shower and tub
- Install toilet
- Install lighting fixtures
- Add GFCI outlets and smart switches
- Paint or finish walls
- Install mirrors, towel bars, and accessories
- Clean thoroughly after construction
- Walk through with contractor or checklist
- Fix any final punch list items
How else to make your bathroom remodel less stressful.
Bathroom Design and Planning Phase
Set a Realistic Budget
Before anything else, decide how much you’re willing to invest in your bathroom remodel project.
Budgeting isn’t just about the big-ticket items like a new shower or high-end sinks.
You’ll also need to factor in labor, permits, delivery fees, and any additional costs tied to surprises behind the walls. A good rule is to leave 10 to 20 percent of your total budget for unexpected expenses.
If you’re working with a general contractor, they can help you estimate costs and recommend where to spend or save.
Your budget should also reflect the bathroom size, layout changes, and whether you want high-end bathroom fixtures or cost-effective upgrades.
What are the common hidden bathroom remodel costs?
Define the Layout and Style
Your bathroom’s dimensions will help determine what’s possible in the new layout.
A compact powder room might only need a simple vanity and toilet, while a primary bath can handle a freestanding tub, double sinks, and even a separate toilet room.
This is also the time to clarify your design vision.
Whether you’re leaning modern, rustic, or minimalist, pick a style that flows with the rest of your house.
Gathering bathroom design ideas from magazines, Pinterest, or even a stroll through the showroom at the Merrifield Garden Center or Home Depot near Skyline Drive can help.
Obtain Permits Early
Not all projects require a permit, but if your remodel involves moving walls, updating electrical, or changing plumbing, permits are usually mandatory.
Permits exist to ensure the remodel meets current code requirements and is safe for your home.
Check with your local municipality early in the planning phase so you know exactly what’s needed before any work begins.
Your contractor can often handle the permit process for you.
Source Materials Ahead of Time
Delays often happen when materials arrive late or go out of stock.
Once you’ve finalized your bathroom design, order materials with long lead times early, especially flooring, tile, custom cabinets, and plumbing fixtures.
When possible, try to choose everything upfront, including faucets, sinks, lighting fixtures, and tile. This gives your contractor a solid plan and helps your project move smoothly.
Let’s design and build your bathroom together.
Bathroom Demolition and Preparation
Tear Out Existing Materials
Removing old flooring, vanities, wall tile, and fixtures is messy work.
Make sure you shut off the water and power before you start. You’ll also want to remove drywall in areas where plumbing or wiring will be updated.
This part of the remodeling journey sets the stage for the new space, so take the time to do it carefully. Avoid damaging any structures you plan to reuse or leave in place.
Inspect for Hidden Issues
Once the walls and flooring are open, look for water damage, mold, or outdated wiring.
Fixing these issues now prevents larger problems later, and it’s one of the reasons your budget needs wiggle room.
Subfloor repairs, new insulation, or reinforcing joists might not have been in your original plan, but they’re often necessary for a safe and functional bathroom.
Prepare the Work Area
Cover nearby furniture or floors to protect against dust and debris.
You may want to install plastic barriers or zip walls if your bathroom is near common living areas.
If this is your only bathroom, plan for an alternate shower and toilet setup while the work is underway.
A well-prepped jobsite helps the contractor stay organized and keeps your project on schedule.
Plumbing and Electrical Rough-Ins
Plumbing Upgrades
During the rough-in stage, your contractor will install or reroute plumbing lines for the toilet, tub, shower, and sinks.
This is the best time to upgrade aging pipes or add new shutoff valves and water lines.
Don’t forget smaller but critical details like the placement of shower valves or the height of faucet hookups.
A quality rough-in ensures long-term performance and easier maintenance later.
Other bathroom upgrades you’ll really want.
Electrical Wiring
This is also the time to run wiring for lighting fixtures, GFCI outlets, exhaust fans, and any specialty upgrades like heated floors or a lighted mirror.
Make sure there are enough outlets for daily needs like electric razors, curling irons, and toothbrush chargers.
Up-to-code wiring and a thoughtful lighting plan go a long way in creating a functional bathroom.
Ventilation Considerations
Proper ventilation is key to preventing mold and maintaining air quality, especially during Virginia’s muggy summers when humidity clings like the mist over the Potomac.
If your bathroom doesn’t already have a strong exhaust fan, install one now and vent it directly outside.
If your new bathroom has a window, natural light and airflow can help, but it’s not a substitute for a quality ventilation fan.
Bathroom Surfaces and Structures
Walls and Ceilings
Once the plumbing and wiring pass inspection, it’s time to close up the walls and ceiling.
Use moisture-resistant drywall or cement board around wet zones like the shower or tub area.
If you’re adding decorative wall features like beadboard or tile wainscoting, now’s the time to install the backing materials.
Ceiling work—like new paint, crown molding, or recessed lights—should also be completed before moving on.
Flooring Prep and Installation
A level subfloor is crucial for any tile floor or vinyl plank system.
Repair or replace old subflooring before installing a new base layer, especially if there was previous water damage.
Choose bathroom flooring that’s waterproof, slip-resistant, and easy to clean. Tile is a top choice, but newer waterproof laminates and vinyl options can work just as well in the right setting.
Tiling and Waterproofing
If you’re installing wall tile in the shower or around the tub, proper waterproofing is non-negotiable.
Use a waterproof membrane or backer board system under the tile.
Plan your layout carefully before setting the first piece, especially in areas that need cuts around niches, plumbing fixtures, or windows.
Sealing grout after installation protects against stains and mildew.
Bathroom Fixtures and Features
Vanity and Storage
Vanity installation includes setting the base, connecting the sink and faucet, and sealing the edges.
If you’re adding new cabinets, be sure they’re level and anchored securely to studs.
Think through your daily routines and how much storage space you’ll need.
Medicine cabinets, drawers, open shelves, or linen towers can all add function without eating up floor space.
Space-saving ideas for smaller bathrooms.
Shower and Tub
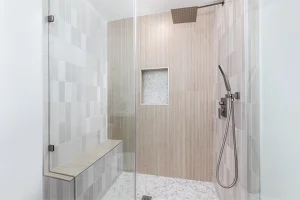
Whether you’re installing a prefab shower kit or a custom tile shower, everything must be waterproofed and sloped properly.
Fixtures like the showerhead, controls, and drain should already be in place from the rough-in stage.
A freestanding tub or an alcove model will need secure leveling and access to plumbing.
Don’t skip the caulk—it’s your final defense against leaks, especially in older homes common to Arlington and Vienna, where settling over time can create sneaky gaps.
Toilet Installation
Set the toilet carefully over a new wax ring or rubber seal, and tighten the bolts just enough to secure it without cracking the porcelain.
Connect the supply line and check for leaks before sealing the base with caulk.
If you’re creating a separate toilet room, make sure it meets local space and ventilation standards.
Lighting and Outlets
Vanity lights should be bright and flattering, mounted at eye level or just above the mirror.
Add overhead lighting for general visibility, and consider accent lights for a spa-like feel.
Every outlet must be GFCI protected and placed where it’s both useful and compliant with code.
Dimmers or smart switches add flexibility.
Finishing Bathroom Remodeling Touches
Paint and Wall Finishes
Now that all the heavy lifting is done, finish walls with paint or other treatments.
Use semi-gloss or satin paints with moisture resistance to hold up against steam and splashes.
This is also the moment to add any design flourishes like wallpaper, accent tile, or decorative panels.
Hardware and Accessories
Install mirrors, towel bars, toilet paper holders, hooks, and shelves.
Double-check the placement for comfort and usability before drilling into finished surfaces.
Even small items like faucets and drawer pulls can elevate the look of your bathroom renovation when chosen thoughtfully.
Clean-Up and Inspection
Do a thorough cleaning to remove construction dust, stray grout, and smudges on new fixtures.
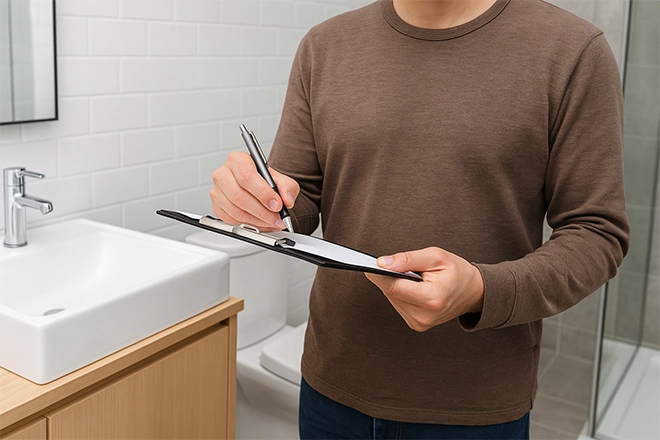
Then walk through your bathroom remodel project with your contractor and checklist in hand.
Take note of any minor issues and have them addressed before signing off.
Once complete, step back and admire your new bathroom—it’s yours to enjoy, whether you’re unwinding after a morning hike in Great Falls Park or prepping for a night out in Clarendon.
From Demo to Done: Foley Construction & Contracting Has You Covered
Foley Construction & Contracting brings craftsmanship, project management, and an eye for design to every bathroom remodel in northern Virginia. Whether you’re updating a powder room or starting fresh with a full-scale bathroom remodel, we help you build a space that works for your life.
If you’re ready to take the first step toward a functional, beautiful new bathroom, fill out our contact form today or give us a call. Let’s turn your dream bathroom into a reality you can walk into every single day.